Setting up LXD on Ubuntu 16.04

1. Overview

LXD is a container hypervisor providing a ReST API to manage LXC containers.

It allows running containers and managing related resources, like storage volumes and networks.

This tutorial will show how to install and setup LXD on Ubuntu 16.04 (Xenial Xerus), and how to launch a container and access it.

Requirements

The tutorial requires an Ubuntu 16.04 installation (Desktop or Server), with internet access. This can be either a physical or virtual machine.

Originally authored by Alberto Donato.


2. Install LXD

If you’re running an Ubuntu 16.04 server installation, LXD is already preinstalled on your system.

On Desktop installs, it needs to be installed manually. Open a terminal and run the following commands to install LXD:

sudo apt update

followed by

sudo apt install lxd

Add your user to the LXD group

To allow your user to access the LXD daemon locally, it must be part of the lxd group.

To do so, run

sudo adduser <USER> lxd

where <USER> is your username.

The new group will be effective at the next login session, to apply it to the current shell, run

newgrp lxd

Install ZFS tools

For this tutorial, we’ll set up LXD using the ZFS storage backend.

The ZFS filesystem provides copy-on-write functionality and allows using advanced LXD features, like per-container disk quotas, immediate snapshot/restore, optimized migration (send/receive) and instant container creation from an image.

To install ZFS tools, just run

sudo apt install zfsutils-linux

3. Setup LXD

We can now proceed to set up the LXD daemon.

To do that, run

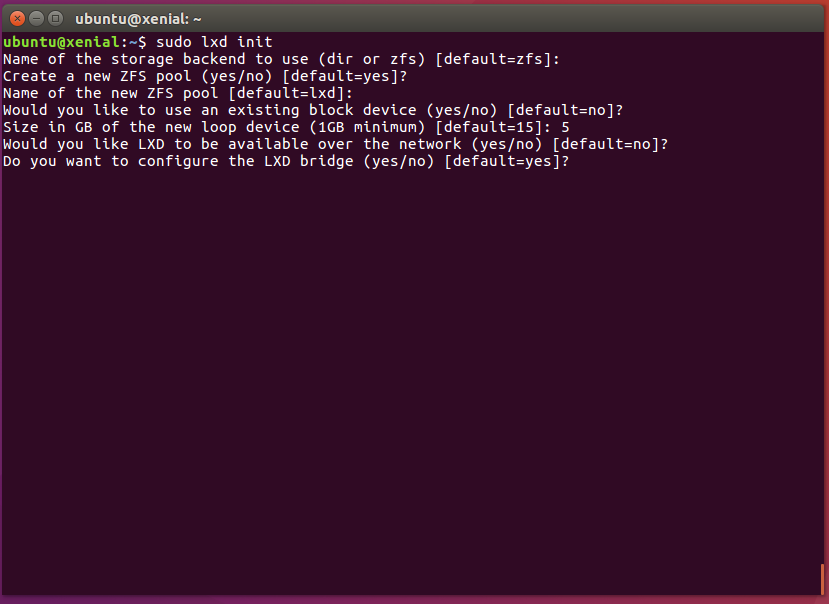
sudo lxd init

which asks a series of questions on how to configure the daemon.

We can just go with the default answer (by pressing Enter) for most of them. You can pick the size of the loop device for the ZFS pool based on your available disk space.

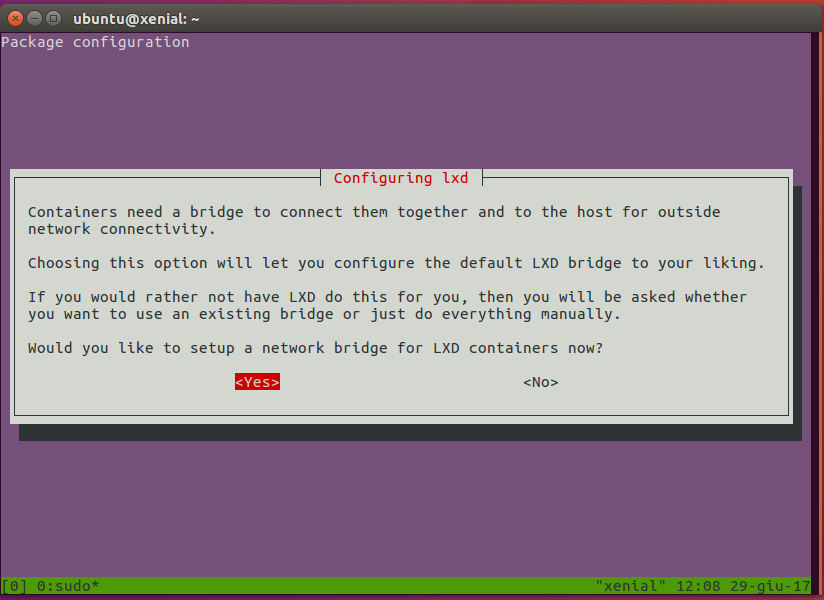
As part of the LXD init setup, networking can be also set up, so that spawned containers can be accessed from the host.

So, let’s select Yes at the first question, to create a network bridge:

Accept the default name for the bridge lxdbr0:

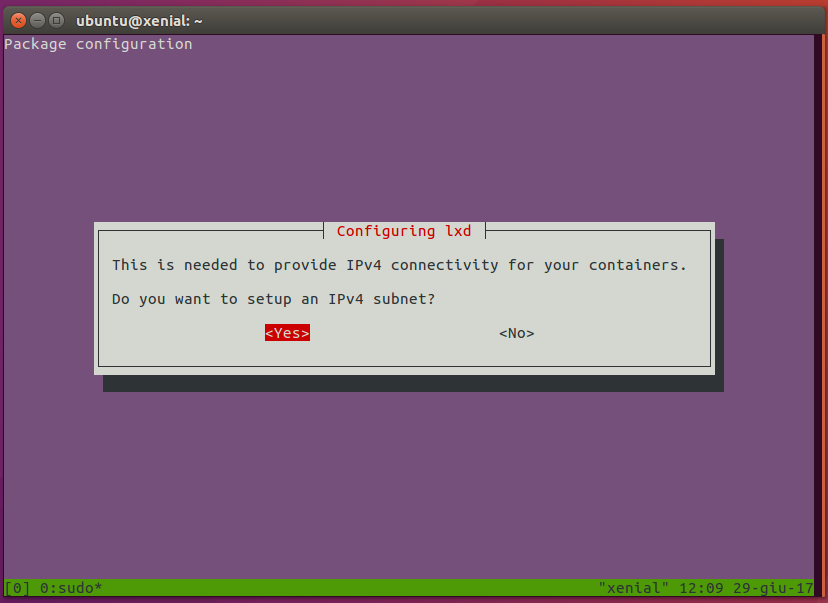
Let’s set up IPv4 networking for the bridge by selecting Yes:

The configurator will ask for a few details on how to configure the IPv4 network, specifically:

  • address
  • CIDR
  • start/end address for DHCP
  • maximum number of DHCP clients

We can accept defaults for those questions too.

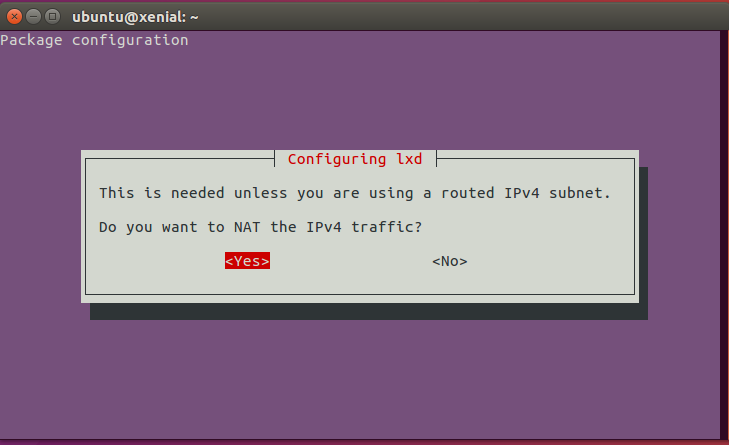
Finally, answer Yes to the question about NAT on the network:

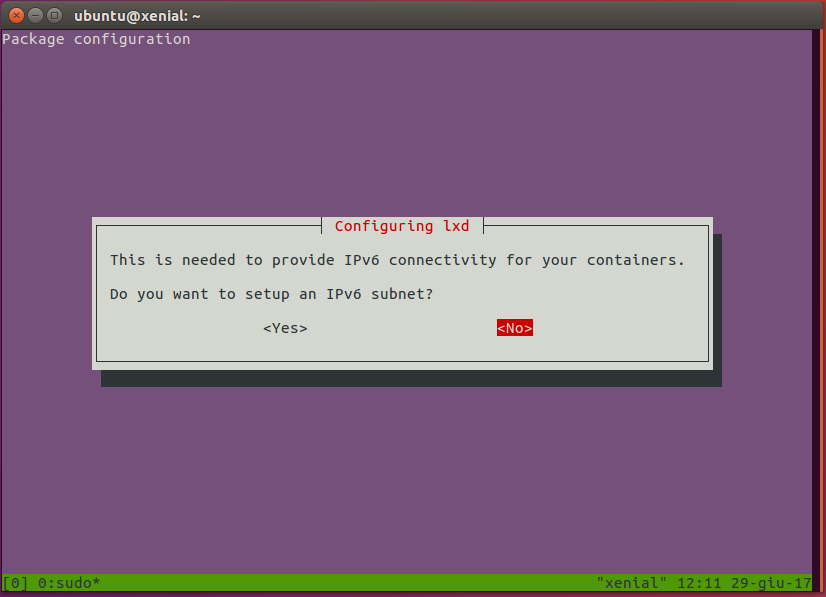
A similar configuration is available for IPv6 networks, but we can ignore it, and just choose not to set up IPv6.

Done! LXD is now set up and ready to be used.


4. Launch a container

It’s now time to start using our LXD.

First, let’s make sure the client can connect to the daemon, by running

lxc list

The output should be similar to

Generating a client certificate. This may take a minute...
If this is your first time using LXD, you should also run: sudo lxd init
To start your first container, try: lxc launch ubuntu:16.04

+------+-------+------+------+------+-----------+
| NAME | STATE | IPV4 | IPV6 | TYPE | SNAPSHOTS |
+------+-------+------+------+------+-----------+

which shows there are no running containers.

Let’s now launch our first container:

lxc launch ubuntu:16.04

The output will be something like this:

Creating stirring-beagle
Starting stirring-beagle

This will download the official Ubuntu 16.04 LTS (Xenial Xerus) image and launch a container with it.

If a container name is not provided (like in this case), a random one will be generated.

Let’s check that our container is indeed running with lxc list:

+-----------------+---------+-----------------------+------+------------+-----------+
|      NAME       |  STATE  |         IPV4          | IPV6 |    TYPE    | SNAPSHOTS |
+-----------------+---------+-----------------------+------+------------+-----------+
| stirring-beagle | RUNNING | 10.147.177.171 (eth0) |      | PERSISTENT | 0         |
+-----------------+---------+-----------------------+------+------------+-----------+

We can execute commands in the container using lxc exec:

lxc exec stirring-beagle -- ls -la

which will run the provided command as root on the target container:

total 7
drwx------  3 root root    5 Jun 29 11:29 .
drwxr-xr-x 22 root root   22 Jun 19 23:52 ..
-rw-r--r--  1 root root 3106 Oct 22  2015 .bashrc
-rw-r--r--  1 root root  148 Aug 17  2015 .profile
drwx------  2 root root    3 Jun 29 11:29 .ssh

Shell access to the container can be obtained with lxc exec stirring-beagle /bin/bash

Note that since we also set up networking, the container has an IPv4 address (as shown by lxc list) and can be also reached via ssh from the host. This, however, requires importing an ssh key in the container first.

Once the container is no longer needed, it can be stopped

lxc stop stirring-beagle

and destroyed

lxc delete stirring-beagle

5. That’s all!

Your machine is now set up to run LXD containers.

LXD provides many more features and allows great flexibility in configuring containers, limiting container resources and access.

If you’d like to know more about LXD and its advanced uses, take a look at the following resources:

Also, if you have questions or need help, you can find direct help here: